StoryShots


![]()
![]()
![]()
StoryShots adds automatic Jest Snapshot Testing for Storybook.
This addon works with Storybook for: React and React Native.
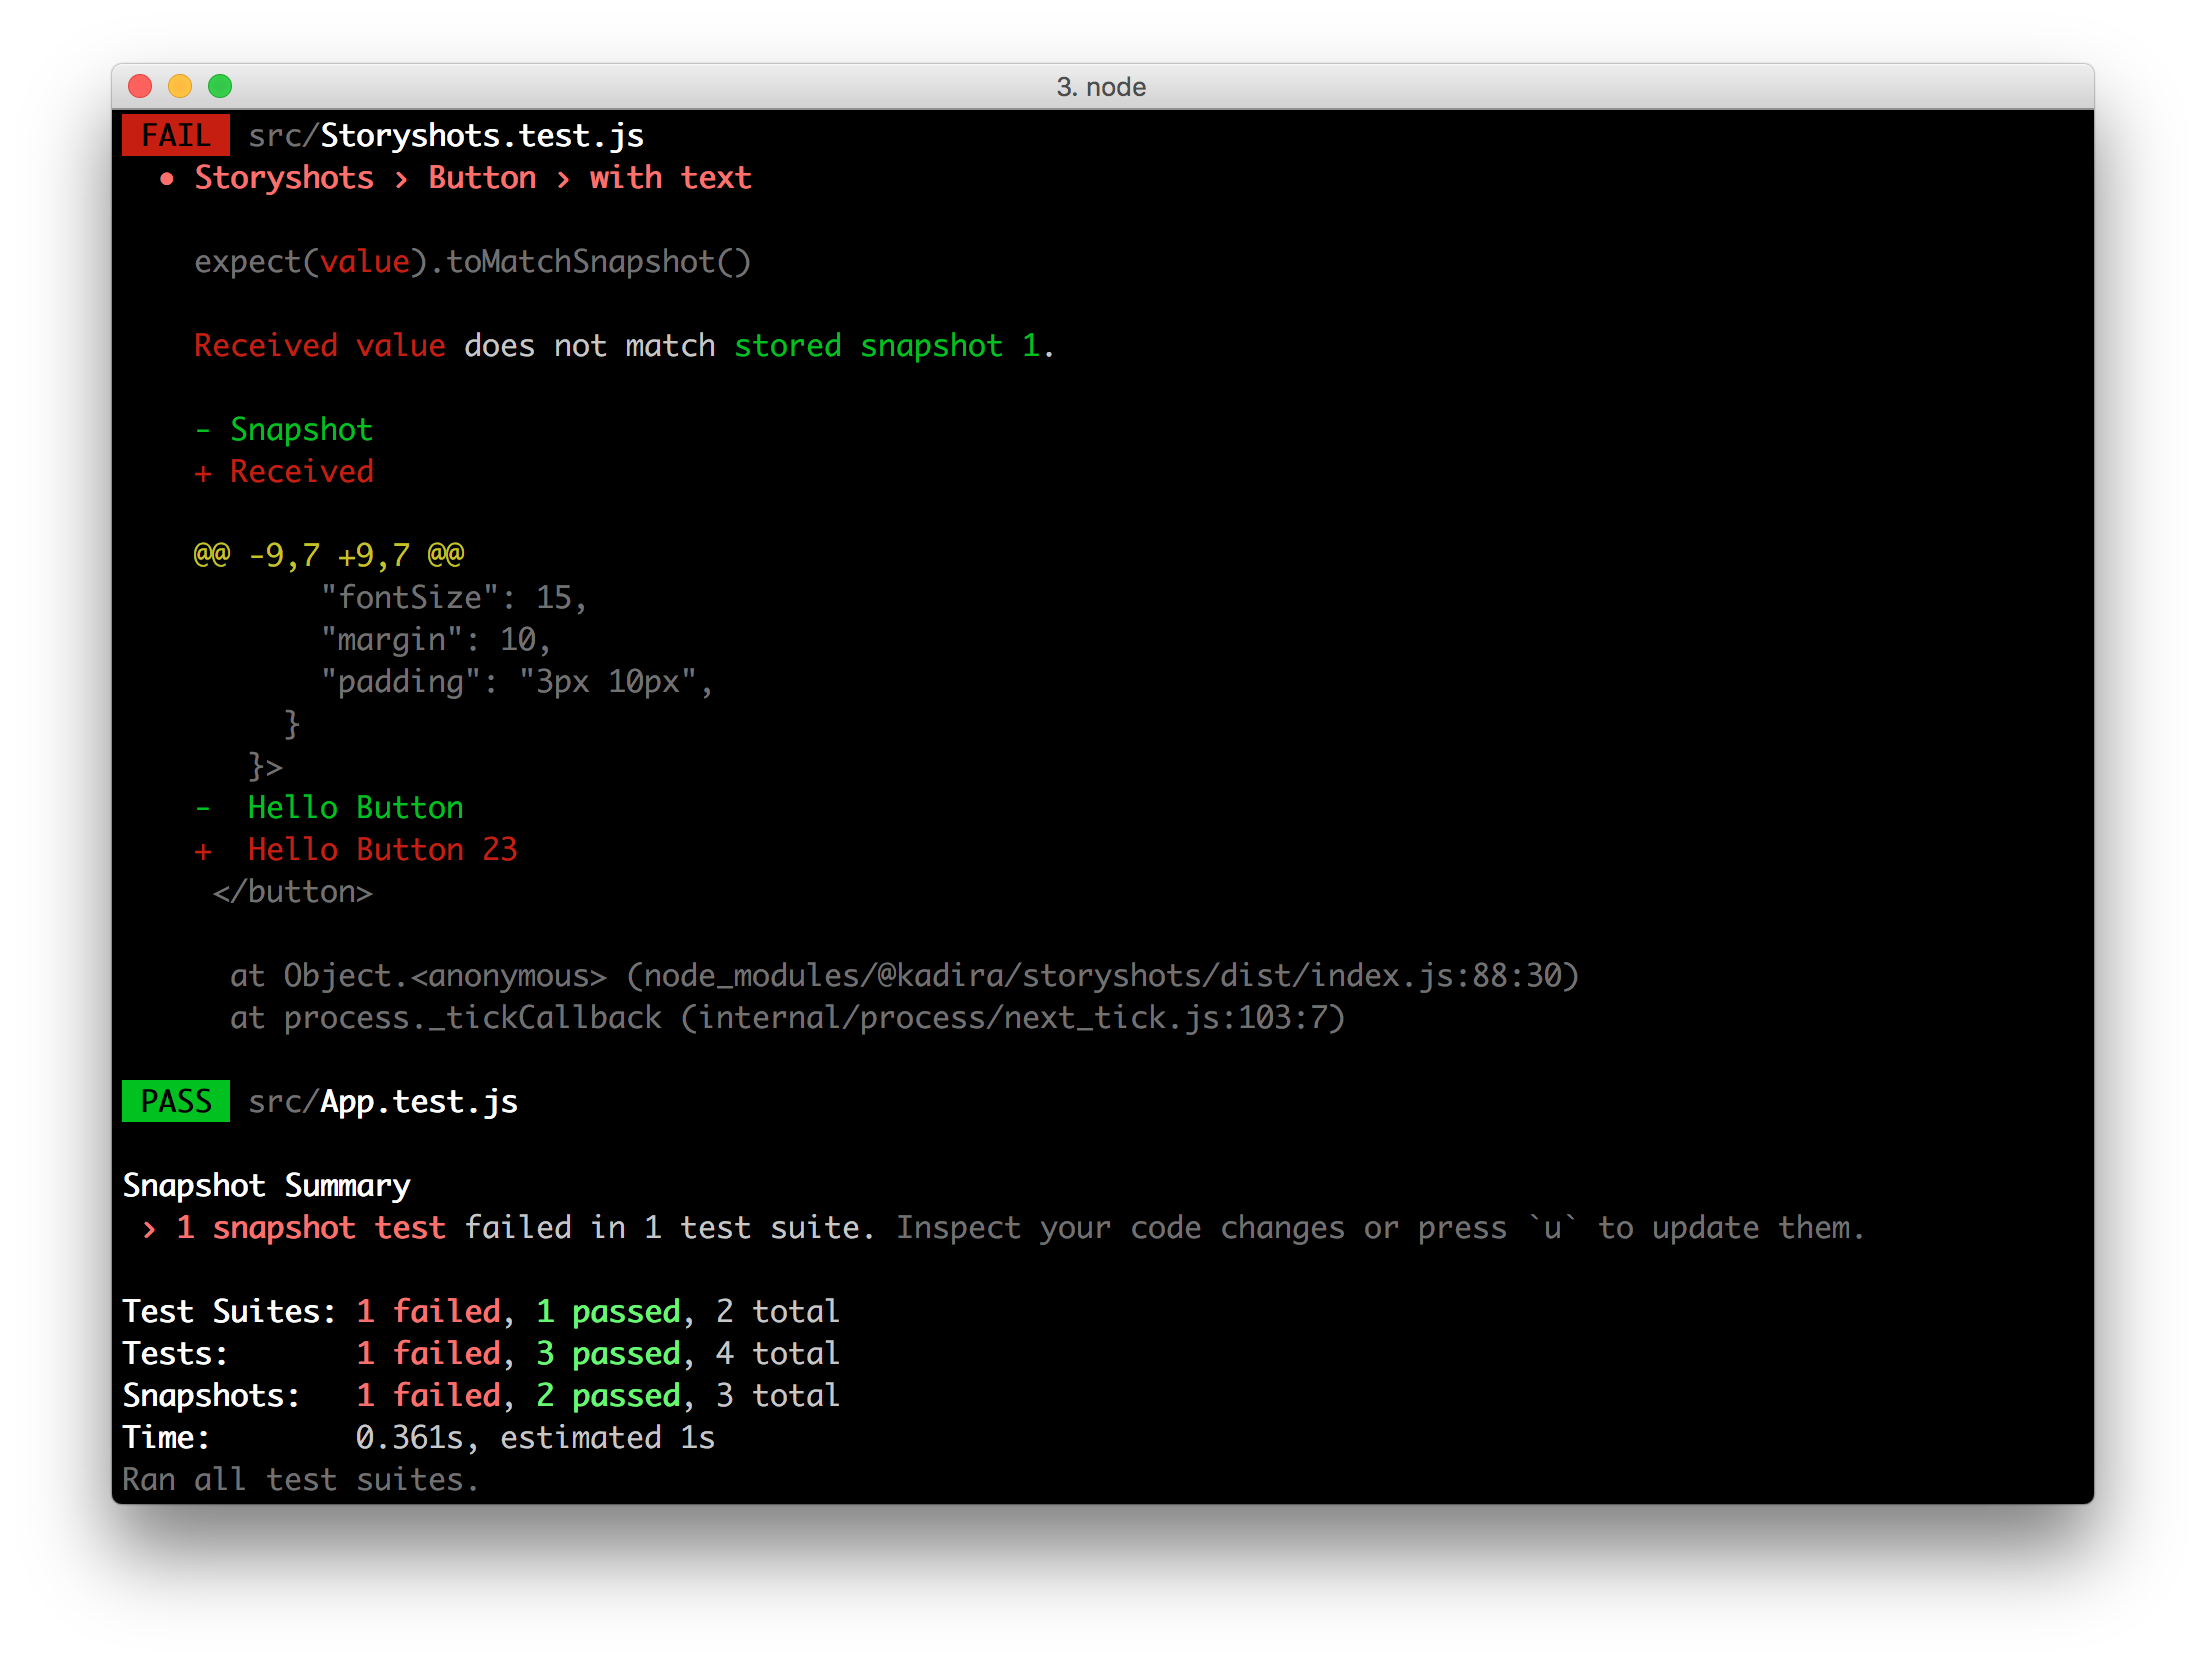
To use StoryShots, you must use your existing Storybook stories as the input for Jest Snapshot Testing.
Getting Started
Add the following module into your app.
npm install --save-dev @storybook/addon-storyshots
Configure your app for Jest
Usually, you might already have completed this step. If not, here are some resources for you.
- If you are using Create React App, it's already configured for Jest. You just need to create a filename with the extension
.test.js. - Otherwise check this Egghead lesson.
Configure Storyshots
Create a new test file with the name Storyshots.test.js. (Or whatever the name you prefer).
Then add following content to it:
import initStoryshots from 'storyshots';

initStoryshots();
That's all.
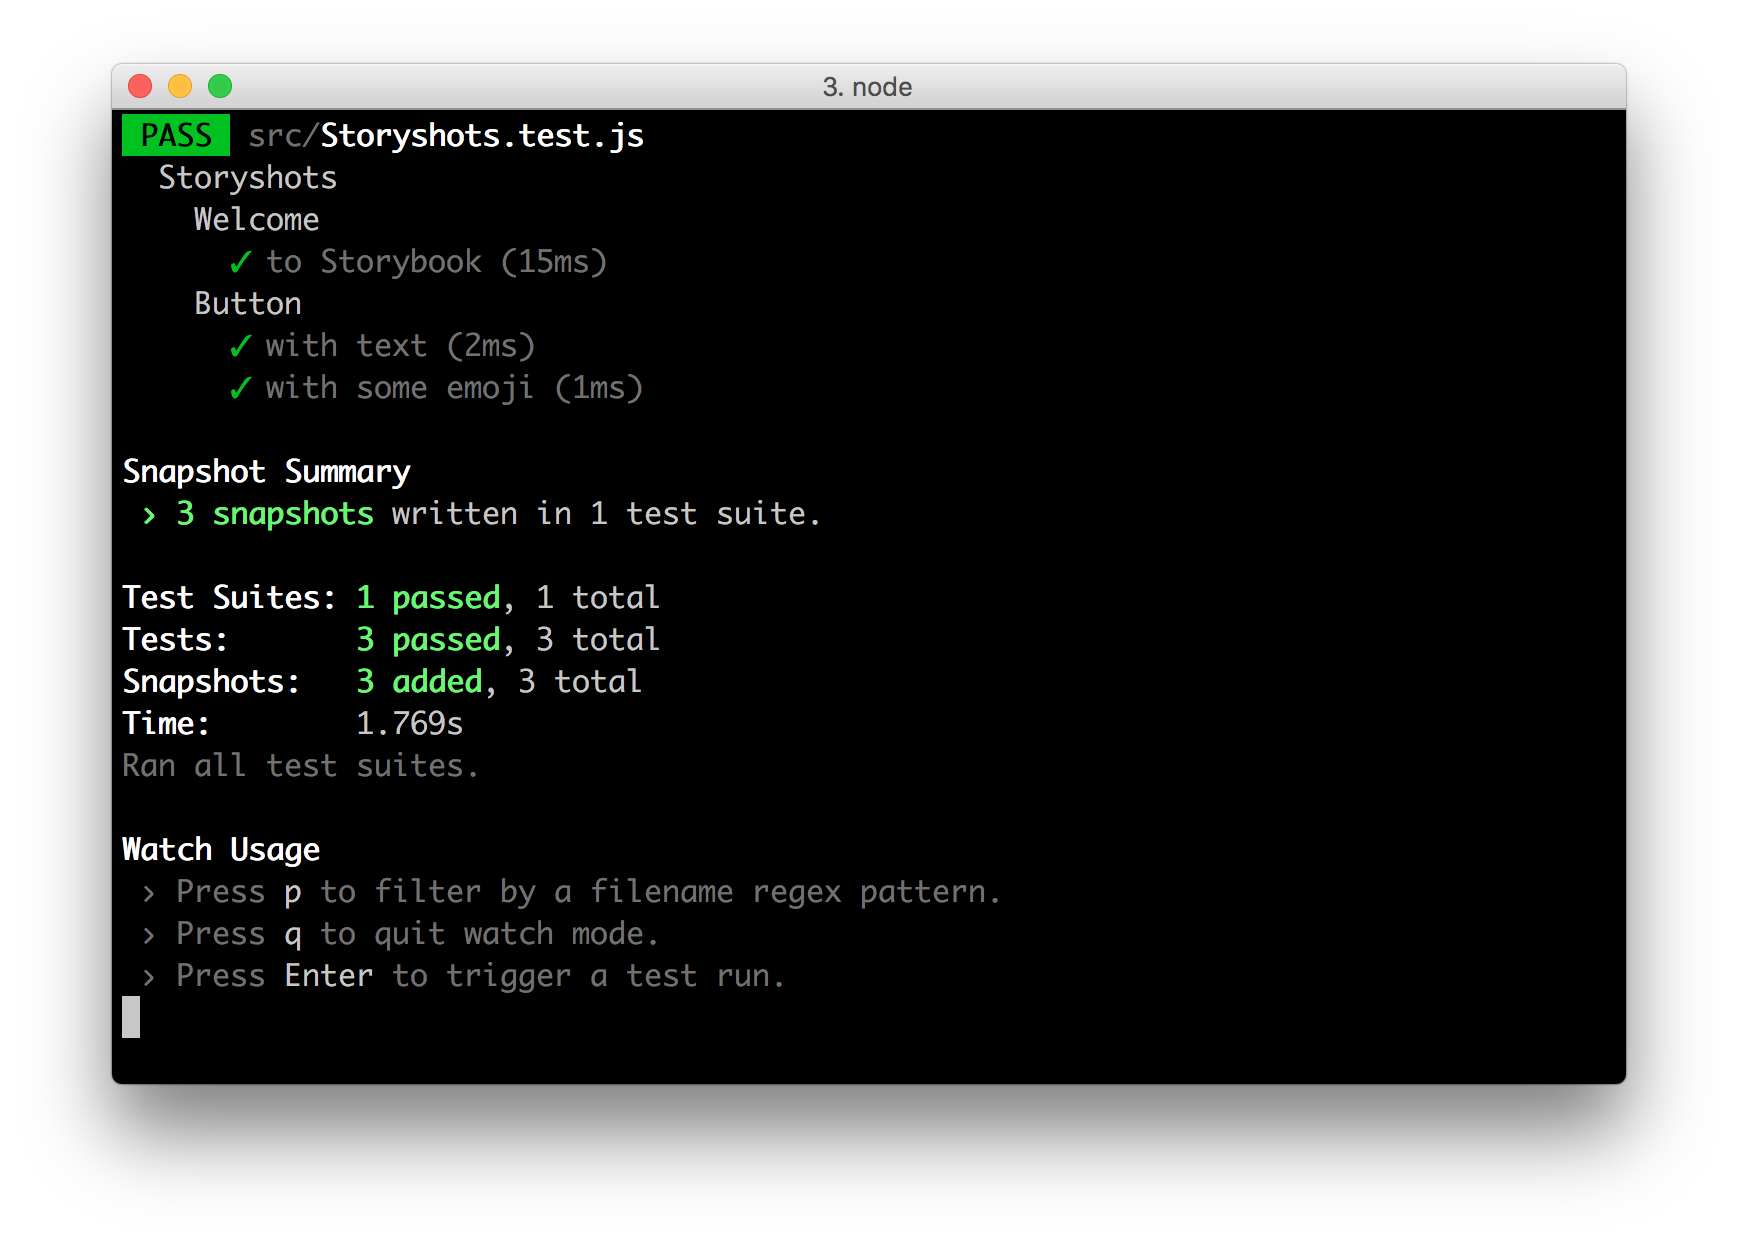
Now run your Jest test command. (Usually, npm test.) Then you can see all of your stories are converted as Jest snapshot tests.
Options
configPath
By default, Storyshots assumes the config directory path for your project as below:
- Storybook for React:
.storybook - Storybook for React Native:
storybook
If you are using a different config directory path, you could change it like this:
initStoryshots({
  configPath: '.my-storybook-config-dir'
});
suit
By default, Storyshots groups stories inside a Jest test suit called "Storyshots". You could change it like this:
initStoryshots({
  suit: 'MyStoryshots'
});
storyKindRegex
If you'd like to only run a subset of the stories for your snapshot tests based on the story's kind:
initStoryshots({
  storyKindRegex: /^MyComponent$/
});
This can be useful if you want to separate the snapshots in directories next to each component. See an example here.
storyNameRegex
If you'd like to only run a subset of the stories for your snapshot tests based on the story's name:
initStoryshots({
  storyNameRegex: /buttons/
});